![]()
Import & Automation Worksheet
I. Camera Raw
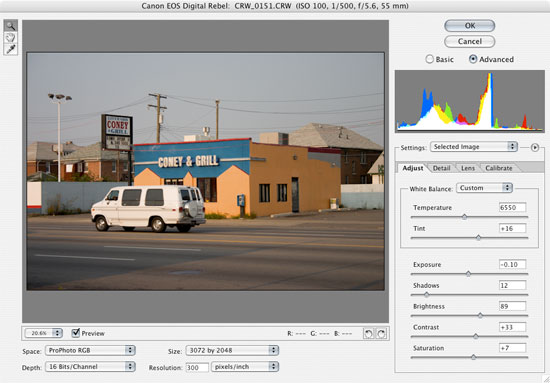
A. Workflow Options
1) Space - ProPhoto RGB is a wide gamut digital raw profile
2) Depth - 16 Bit for maximum tonal range and color potential
3) Size - Interpolate using (W x H) / Resolution = Output Size
(eg. 3072 x 2048 / 300 ppi = 10.24 x 6.82" @ 300 ppi)
* Interpolation is best accomplished on the original file or media.
4) Resolution - Generally 300 ppi should be adequate
B. Adjust
1) Temperature - adjust color casts
2) Tint - adjust color casts
3) Exposure - reveal details with texture
4) Shadows - reveal details with texture
5) Brightness - reveal details with texture
6) Contrast - enhance tonal range
7) Saturation - enhance color accuracy
C. Detail
1) Sharpness - increase to enhance detail
2) Luminance Smoothing - eliminate rough pixels
3) Color Noise Reduction - eliminate noise in fragile areas
D. Lens
1) Chromatic Aberration
a) Fix Red/Cyan Fringe - locate problem edges/halos
b) Fix Blue/Yellow Fringe - locate problem edges/halos
2) Vignetting
a) Amount - adjust tones on the edges of the image
b) Midpoint - increase/decrease size
E. Curve
1) Tone Curve
a) Linear - lightness and contrast
b) Medium - lightness and contrast
c) Strong - lightness and contrast
d) Custom - lightness and contrast
F. Calibrate
1) Camera Profile
a) Shadow Tint - adjust color accuracy
b) Red Hue - shift colors
c) Red Saturation - increase/decrease vibrance
d) Green Hue - shift colors
e) Green Saturation - increase/decrease vibrance
f) Blue Hue - shift colors
h) Blue Saturation - increase/decrease vibrance
II. Automation
A. Contact Sheet II
1) Source Folder
2) Document
a) Width / Height
b) Resolution - 300 ppi
c) Mode - RGB Color
3) Thumbnails
a) Place - across first / down first
b) Columns / Rows - 5 Columns / 6 Rows
4) Use Filename As Caption
a) Font / Font Size - Helvetica / 12
B. Picture
Package
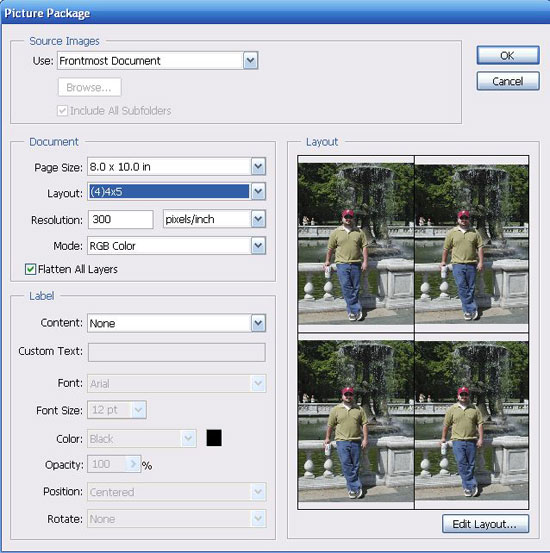
1) Source Images
a) Choose - open document / folder
2) Document
a) Page Size - 8 x 10"
b) Layout - (4) 4x5
c) Resolution - 300 ppi
d) Mode - RGB Color
3) Label
a) Custom Text
b) Font / Font Size
c) Position - centered
III. Actions Palette
A. Wood Frame
B. Sepia
Toning
C. Custom Actions
1) New Action - create new action
2) Record - begin process of steps
3) Stop - capture the steps
4) Play - batch files or open documents to the Action
© 2007, Matthew Roderick